
Mixing and Kneading Techniques
- Proof the Yeast:
Begin by dissolving the sugar in your warm water—around 110°F is optimal. Then gently stir in the yeast. Let this mixture sit for five to ten minutes, or until it looks frothy on top. This step confirms that your yeast is active and ready to work its leavening magic. - Combine Dry Ingredients:
In a large mixing bowl, whisk together the bread flour and salt. These two ingredients distribute more evenly if you stir them first, preventing any overly salty pockets in your final dough. - Form the Dough:
Gradually add the proofed yeast mixture to the flour and salt, blending gently with a spatula or wooden spoon. Once the dough begins to form a shaggy ball, switch to using your hands or a stand mixer with a dough hook attached. - Knead Thoroughly:
If you’re kneading by hand, transfer the dough to a lightly floured surface and knead for about eight to ten minutes. Aim for a smooth, elastic consistency. If the dough is too sticky, sprinkle in a small amount of flour; if it feels too dry, add a few drops of warm water. If using a stand mixer, knead on medium-low speed for approximately five minutes.
Table of Contents
Kneading is crucial because it develops gluten strands, which give your bread the strength and chewiness that’s characteristic of a Panera Bread Bowl. Keep an eye on the dough’s texture—when it feels supple yet still holds its shape, you’re on the right track.
Shaping and Proofing
- First Rise:
Once the dough is kneaded, shape it into a loose ball and place it in a lightly oiled bowl. Cover with plastic wrap or a clean, damp cloth. Put the bowl in a warm area of your kitchen and let the dough rise for one to two hours, or until it doubles in size. - Divide and Shape:
After the dough has doubled, gently punch it down to release excess air. Divide it into your desired portions—four to six pieces usually works well for standard soup servings. Gently shape each portion into a round ball, tucking the seams underneath. The tighter you form each ball, the better your final “bowl” shape will be. - Second Rise:
Place the shaped dough balls on a baking sheet lined with parchment paper. Cover them loosely and let them rise for another 30 to 45 minutes. This second rise gives the dough time to relax, helping to ensure a lighter texture.
During these proofing stages, temperature matters. If your kitchen is on the cooler side, consider placing the dough near a slightly warm oven or in a spot with indirect sunlight. Conversely, in a very warm climate, watch the dough so it doesn’t overproof—if it rises too much, it can collapse.
Baking the Bread Bowl
Creating the Signature Shape
- Score the Dough:
About ten minutes before you plan to bake, preheat your oven to 400°F (200°C). Using a sharp knife or a specialized baker’s lame, make a few shallow slashes on the top of each dough ball. These cuts allow steam to escape and help the bread expand more evenly in the oven. - Bake with Steam:
For that classic crusty exterior, place a small pan of water on the lower rack of your preheated oven. The steam generated during baking keeps the crust from forming too quickly and results in a more artisanal finish—much like the texture you’d get from a Panera Bread Bowl. - Baking Time:
Slide your dough rounds onto the center rack and bake for approximately 20 to 25 minutes. The exact time can vary depending on your oven, but you’ll know the bread bowls are done when they’re golden brown and sound hollow when tapped on the bottom.
Tips for a Crisp Exterior and Soft Center
- High Heat: Aim for 400°F to 425°F, depending on how your oven behaves. A burst of heat helps lock in moisture and develop a golden crust.
- Thermometer Check: You can use an instant-read thermometer to confirm the internal temperature is around 200°F (93°C). This ensures the bread is fully cooked without drying out.
- Cool Before Hollowing: Once they’re out of the oven, let the loaves cool on a wire rack for at least 15 minutes. This cooling period helps set the interior crumb, making it easier to scoop out the center without tearing the sides.
Filling Ideas for Your Homemade Bread Bowl
The bread bowl is only half the experience; the other half is what you choose to ladle inside. A variety of soups, stews, and chowders work beautifully, but feel free to get creative. You can even try pasta dishes or creamy dips if you want to think outside the bowl.
Classic Soups and Creamy Chowders
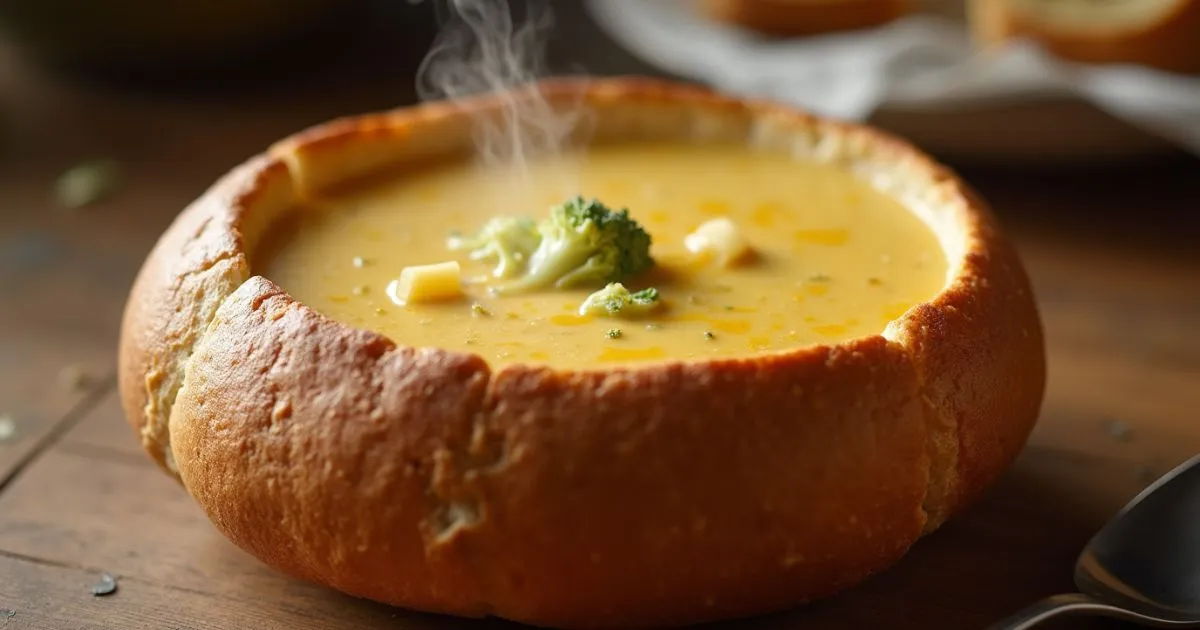
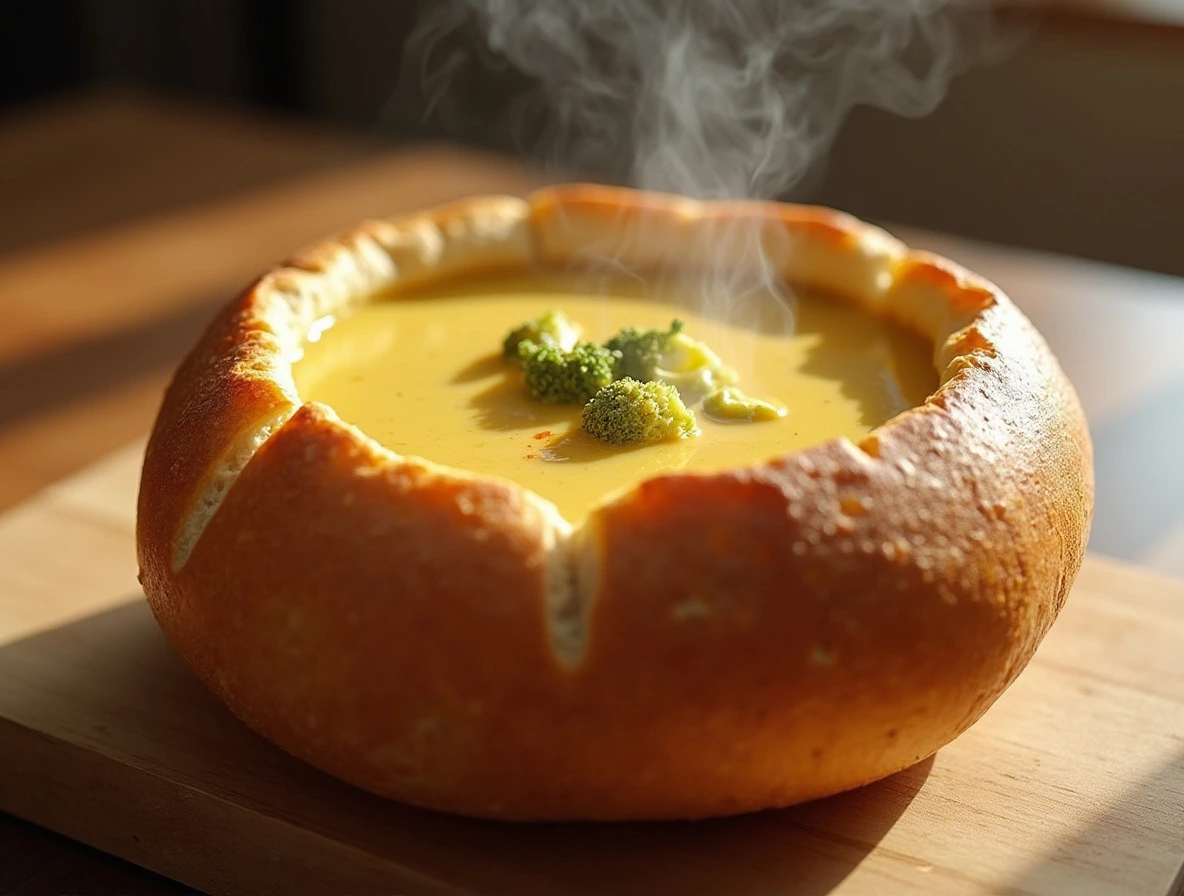
- Broccoli Cheddar Soup: Perhaps the most iconic Panera offering. Its velvety blend of cheddar cheese, tender broccoli, and creamy base complements the chewy bread, making every spoonful a warm, nostalgic hug.
- Creamy Tomato Bisque: If you love tangy tomatoes balanced by rich cream, this soup is a perfect fit for your newly baked bread bowl. Enhance it further with a swirl of fresh basil puree on top.
- New England Clam Chowder: The thick, hearty consistency of clam chowder is tailor-made for a bread bowl, ensuring every bite is loaded with tender clams and potatoes.
Hearty Stews and Chilis
- Beef Stew: For a more substantial meal, you can’t go wrong with chunky beef stew. Laden with soft carrots, potatoes, and peas, it’s a one-bowl meal that’ll keep you satisfied for hours.
- Vegetarian Chili: Packed with beans, veggies, and spices, chili is not only comforting but also a great source of plant-based protein. The bread bowl soaks up the chili’s flavors, leaving no morsel behind.
- Chicken and Wild Rice Soup: Another Panera favorite that pairs perfectly with fresh bread. The combination of tender chicken, nutty wild rice, and herbs creates a soul-soothing meal.
Feel free to adjust any recipe to match your dietary preferences or to incorporate seasonal produce. The beauty of homemade bread bowls lies in their adaptability—you have total control over what goes inside.
Serving Suggestions and Storage Tips
Presentation and Garnish
You’ve spent time and effort perfecting these bread bowls, so why not present them in a way that wows your family or guests? Here are a few ideas:
- Cut a Lid: Use a sharp knife to carve a circular “lid” at the top of each loaf. Scoop out most of the soft interior, but leave enough thickness on the sides to hold the soup.
- Garnishes: Elevate the dish with a sprinkle of fresh herbs (like parsley or chives), a drizzle of extra virgin olive oil, or a pinch of grated cheese.
- Side Salad: A simple green salad or a slice of artisan cheese can turn your bread bowl meal into a complete culinary experience.
Best Practices for Leftovers
- Storing Bread Bowls: If you anticipate leftovers, store the remaining bowls in a zip-top bag or airtight container once they’ve cooled. They should maintain good quality for up to two days at room temperature.
- Refreshing the Crust: To bring back that fresh-baked crispness, lightly spritz the bread bowls with water and pop them into a 350°F (175°C) oven for about five to seven minutes.
- Freezing the Dough: If you’d prefer to freeze the dough rather than bake all at once, do so after the first rise. Shape your dough into rounds, wrap them tightly, and store them in the freezer for up to three months. When you’re ready to bake, thaw the dough in the fridge overnight, let it come to room temperature, and give it a second rise before baking.
These methods help you enjoy homemade Panera Bread Bowls whenever you’d like—no need to worry about day-old bread losing its magic.
Conclusion
Making a Panera Bread Bowl at home isn’t just about replicating a restaurant favorite; it’s a culinary journey that allows you to expand your skills, explore new flavors, and ultimately craft a meal that connects you with fond memories or new traditions. From measuring out the flour to smelling that first burst of steam when you remove the lid from your soup, each step is a reminder of the simple joys that good food can bring. You’re in control of every aspect—using whole wheat, adding herbs, or choosing the soup that best suits your mood. With each bowl you bake, you’re weaving your personal story into the dough and sharing it with those around you.
Frequently Asked Questions (FAQ)
1. Can I Use Whole Wheat Flour for My Panera Bread Bowl?
Absolutely. Whole wheat flour adds a wholesome, nutty flavor and boosts the fiber content. However, because whole wheat flour absorbs more liquid, you may need to increase the water slightly. Keep an eye on the dough’s texture during mixing and kneading, adjusting as necessary.
2. How Do I Prevent My Bread Bowl from Becoming Soggy?
To keep the inside of your bread bowl from becoming mushy, consider brushing the interior with melted butter or olive oil, then toasting it lightly before adding soup. Also, serve the soup immediately. The longer the soup sits, the more it seeps into the bread.
3. Can I Freeze the Finished Bread Bowls?
Yes, you can. Wrap the fully baked and cooled bread bowls in plastic wrap and store them in a freezer-safe bag or container. They’ll retain their quality for about two months. Thaw overnight in the fridge and reheat in a 350°F oven for five to seven minutes to refresh the crust.
4. What’s the Best Soup to Serve in a Homemade Panera Bread Bowl?
While broccoli cheddar is a signature option, any thick, hearty soup or stew does the trick. Tomato bisque, potato soup, or a robust chili work exceptionally well. Thicker consistencies help the bread maintain its structure.
5. How Do I Store Leftover Dough?
If you’d rather not bake all your bread bowls at once, store the leftover dough in the freezer after the first rise. Portion it into round shapes, wrap them individually, and place them in an airtight container. When ready to bake, thaw in the refrigerator, shape, let the dough rise again, and then bake as usual.
Call to Action:
Give the homemade Panera Bread Bowl a go this weekend. Gather your ingredients, enjoy the relaxing process of baking, and experiment with various fillings. Once you’re happy with your recipe, share it on social media or host a cozy dinner to showcase your culinary skills. Each new loaf brings a sense of accomplishment, so keep exploring and have fun along the way.