
Imagine waking up to the sweet aroma of freshly baked blueberry danishes wafting through your kitchen. This isn’t just a recipe—it’s a gateway to cherished memories and a taste of home. As you embark on your blueberry danish journey, you’ll discover not only the art of pastry-making but also a chance to create moments that resonate with warmth and comfort. Let this guide be your companion as you dive into a world where every step brings you closer to that perfect, flaky, and irresistibly fruity pastry.
Table of Contents
Understanding Blueberry Danishes
What Makes a Blueberry Danish Special?
Blueberry danishes hold a unique charm that sets them apart from ordinary pastries. Their magic lies in the harmonious blend of tangy, juicy blueberries with a rich, buttery dough. You’ll find that each bite offers a delightful contrast—light and flaky layers enveloping a burst of natural blueberry sweetness. These pastries are perfect whether you’re savoring them as a hearty breakfast or enjoying them as an indulgent dessert after dinner.
- Flavor Fusion: The balance between the subtle tang of the blueberries and the luxurious, tender pastry makes every danish a treat for your taste buds.
- Versatility: Whether paired with your morning coffee or served as a sweet finish to a meal, blueberry danishes can fit any occasion.
- Cultural Roots: Originating from Danish culinary traditions, these pastries carry with them a story of heritage and evolution that has shaped modern baking techniques.
The History Behind Danish Pastries
The danish pastry, as you may know, has its origins in Denmark—a country renowned for its meticulous baking methods and rich culinary traditions. Over time, these pastries evolved, adapting to new ingredients and techniques as they traveled across borders. Today, the blueberry danish is a modern twist on this classic recipe, blending traditional methods with the vibrant flavor of fresh blueberries.
- Heritage: The traditional Danish pastry was initially a labor of love, developed by skilled artisans who took pride in perfecting every layer of dough.
- Modern Adaptations: As recipes evolved, so did the danish, incorporating ingredients like fresh fruit and innovative techniques that cater to today’s palate.
- Expert Insights: Renowned chefs and culinary historians often cite danishes as a prime example of how heritage can inspire contemporary creativity in the kitchen.
Essential Ingredients and Tools
Before you start, it’s crucial to gather the right ingredients and tools that will set you up for success. Quality ingredients make all the difference, and having the proper equipment ensures your process is smooth and enjoyable.
Ingredients for Blueberry Danishes
Below is a handy table to guide you on what you’ll need for your blueberry danishes:
| Ingredient | Quantity | Notes |
|---|---|---|
| All-purpose Flour | 2 1/2 cups | Sifted for a smooth texture |
| Unsalted Butter | 1 cup (cold) | Cut into small cubes |
| Fresh Blueberries | 1 1/2 cups | Washed and thoroughly dried |
| Sugar | 1/2 cup | Adjust based on sweetness |
| Milk | 1/2 cup | Whole milk is ideal |
| Yeast | 2 1/4 tsp | Active dry yeast |
| Egg | 1 (beaten) | For a glossy egg wash |
| Salt | 1/2 tsp | Fine sea salt |
Tools You Will Need
To ensure a smooth baking process, make sure you have the following tools at your disposal:
- Rolling Pin: For rolling out the dough to the perfect thickness.
- Mixing Bowls: Various sizes for mixing ingredients.
- Baking Sheet & Parchment Paper: For a non-stick surface during baking.
- Cooling Rack: To let your danishes cool evenly after baking.
Where to Source the Best Ingredients
Your final result depends on the quality of your ingredients. When shopping for your supplies, consider:
- Local Markets: They often offer fresh, organic produce and high-quality dairy products.
- Specialty Stores: For items like premium flour or artisanal butter.
- Organic Certifications: Look for organic labels to ensure that you are getting ingredients that are both high in quality and free from unnecessary additives.
Step-by-Step Guide on How to Make Blueberry Danishes
Now that you have your ingredients and tools ready, let’s dive into the detailed process of creating your blueberry danishes. Follow these step-by-step instructions to ensure your pastries turn out light, flaky, and bursting with flavor.
Preparing the Dough
Creating the perfect dough is the cornerstone of any great danish. Here’s how to get it just right:
- Activate Your Yeast:
- Warm up your milk until it’s just comfortably warm (around 110°F).
- Dissolve the yeast with a pinch of sugar in the milk. Let it sit until you notice a frothy texture, which indicates that the yeast is active.
- Mixing Ingredients:
- In a large mixing bowl, combine the sifted flour, salt, and cold cubed butter.
- Gradually pour in the activated yeast mixture, mixing gently until all the ingredients start coming together.
- Kneading:
- Transfer the dough to a lightly floured surface and knead it until it becomes smooth and elastic. This process should take about 8-10 minutes.
- Once the dough is ready, cover it with a clean cloth and let it rise in a warm, draft-free area until it has doubled in size.
Expert Tip: The resting period is essential. Patience during this step will reward you with a dough that has just the right texture for layering.
Assembling the Danishes
After your dough has risen, it’s time to move to the assembly phase, where your blueberry danishes take shape.
- Rolling Out the Dough:
- Gently roll out the dough on a well-floured surface to about 1/4-inch thickness. This ensures a delicate balance between crispness and softness.
- Adding the Blueberries:
- Evenly sprinkle your fresh blueberries over the rolled-out dough. If you prefer, mix in a light dusting of sugar to enhance their natural sweetness.
- Shaping Your Danishes:
- Decide on the design: you can either fold the edges inward to create a border or twist the dough in a spiral to encase the blueberries beautifully.
- Egg Wash:
- Brush the tops with a beaten egg to give them a shiny, appetizing finish once baked.
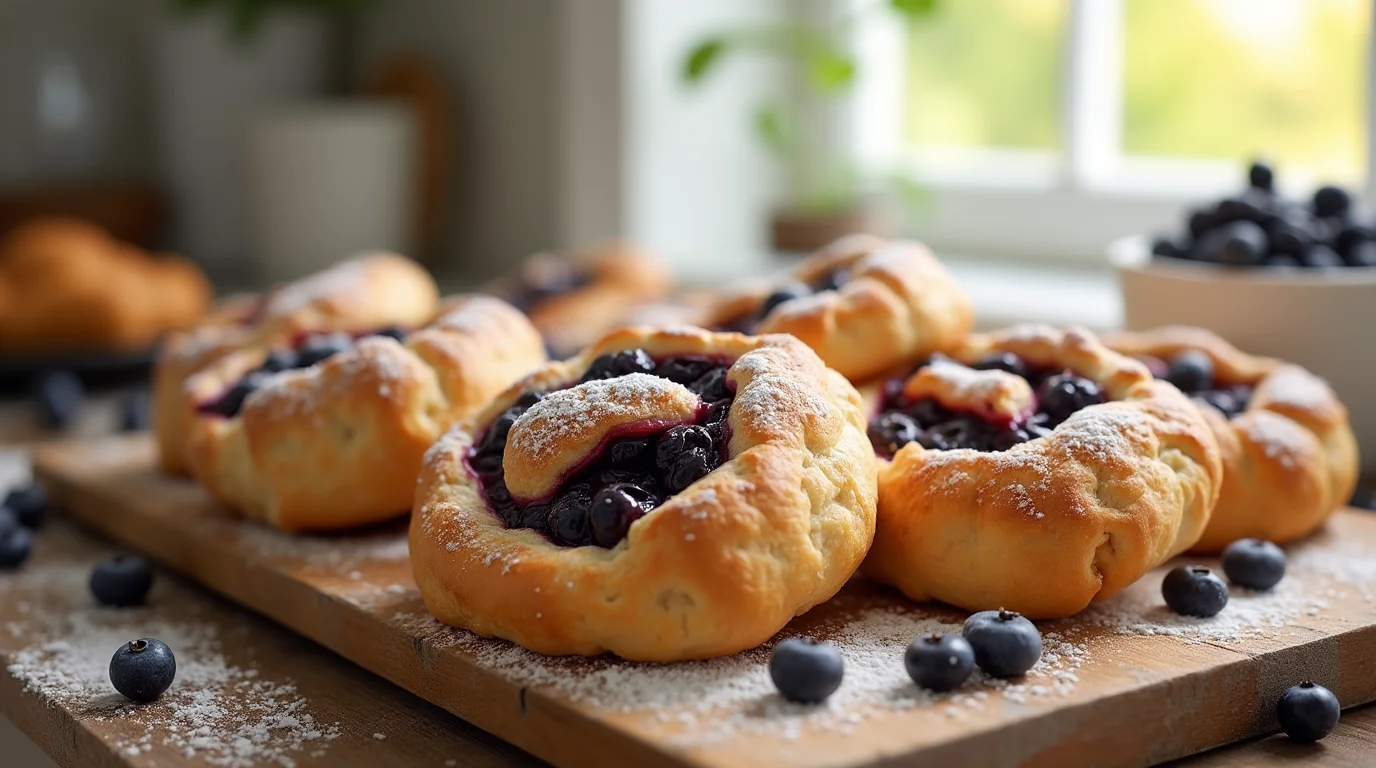
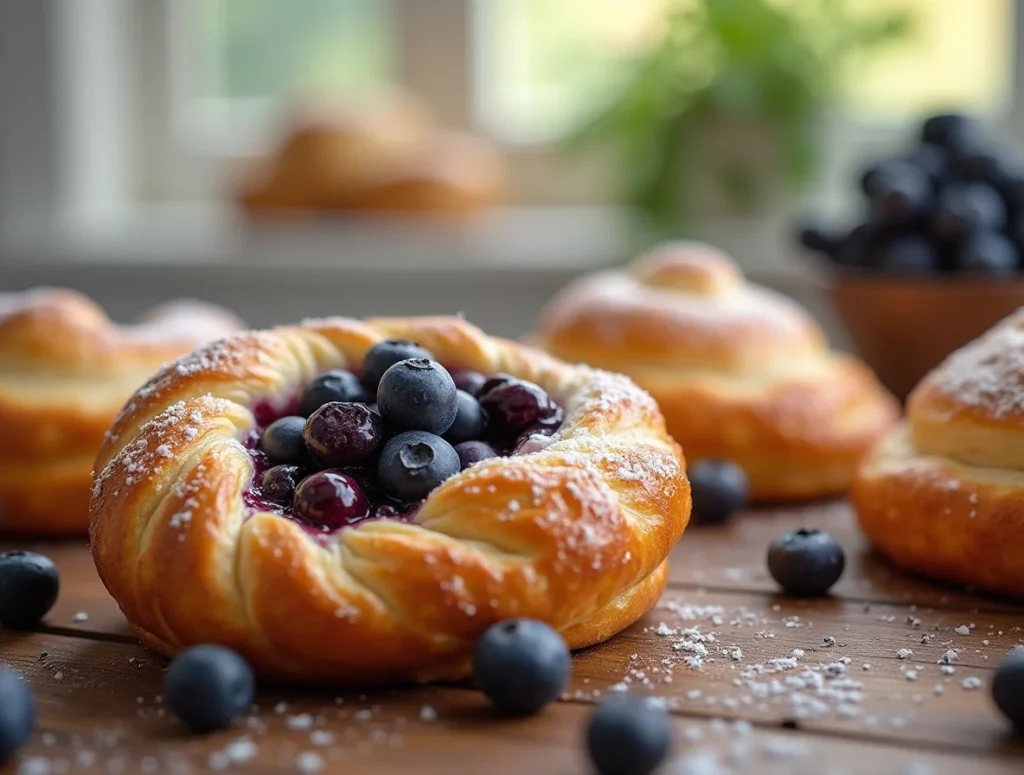
Visual Presentation: Take a moment to admire the pattern you’re creating. A neatly arranged danish is not only pleasing to the eye but also promises a uniform bake.
Baking to Perfection
With your danishes assembled, the final step is baking. Follow these guidelines for a golden-brown finish:
- Preheat Your Oven:
- Set your oven to 375°F (190°C) and allow it to fully preheat. Consistency in temperature is key to a well-risen pastry.
- Baking Duration:
- Place your danishes on a lined baking sheet and bake for 15-20 minutes or until they turn a beautiful, golden hue.
- Checking for Doneness:
- The danishes should be crisp on the edges and soft in the center. If they’re still pale, give them a few more minutes—just be careful not to overbake.
- Cooling:
- Once baked, transfer your danishes to a cooling rack. This helps maintain their crisp texture as they cool down.
Pro Tip: Avoid opening the oven too frequently during baking, as this can affect the rising process.
Enhancing Your Blueberry Danishes Experience
Baking is an art, and your blueberry danishes can be elevated further with creative serving suggestions and smart storage solutions.
Serving Suggestions and Pairings
Your blueberry danishes are versatile, making them an excellent choice for any time of day. Consider these ideas to enhance your experience:
- Morning Boost:
- Enjoy your danishes with a robust cup of coffee or a freshly brewed latte. The bitterness of the coffee complements the sweet, tangy flavors of the pastry.
- Afternoon Treat:
- Pair your danishes with a soothing cup of herbal tea or a splash of cold milk. They’re perfect for a mid-day snack or a light dessert.
- Creative Toppings:
- Elevate the presentation with a drizzle of lemon glaze or a dusting of powdered sugar. These small touches add a layer of sophistication to your dish.
Storage and Reheating Tips
Not every danish will vanish in one sitting. Here are some practical tips for storing and reheating your blueberry danishes without sacrificing their delicate texture:
- Storage:
- Place any leftover danishes in an airtight container. They will keep fresh for up to two days at room temperature.
- Reheating:
- When you’re ready to enjoy them again, warm them in an oven preheated to 350°F (175°C) for about 5-7 minutes. This method helps revive the crispness of the pastry while warming the blueberries inside.
- Avoiding Microwave Pitfalls:
- Microwaving can make the pastry soggy, so it’s best to use the oven if you want to enjoy that freshly baked crunch.
Frequently Asked Questions (FAQ) on Blueberry Danishes
What is the best type of blueberry to use in blueberry danishes?
For the best flavor and texture, choose fresh, organic blueberries. Their natural sweetness and slight tartness work perfectly with the buttery pastry.
Can I substitute ingredients for a gluten-free version of blueberry danishes?
Yes, you can! Simply swap out the all-purpose flour for a high-quality gluten-free flour blend. Remember that you may need to adjust the liquid ingredients slightly to achieve the right dough consistency.
How do I ensure the dough stays flaky and light?
The secret to a flaky dough lies in handling it with care. Use cold butter, allow the dough to rest adequately, and maintain a consistent oven temperature during baking.
What are some common mistakes when making blueberry danishes and how can I avoid them?
Overworking the Dough: Too much kneading can result in a tough pastry. Uneven Blueberry Distribution: Make sure the blueberries are spread evenly to ensure every bite is balanced in flavor. Inconsistent Temperature: Always preheat your oven fully and avoid frequent door openings during baking.
Each of these FAQs directly addresses common concerns, ensuring that you have all the necessary information to perfect your blueberry danishes.
Conclusion
Baking blueberry danishes is more than just following a recipe—it’s an exploration of flavor, tradition, and personal creativity. From selecting the finest ingredients and tools to mastering the techniques that yield that perfectly flaky dough, every step in this guide is designed with your success in mind.
As you mix, roll, and bake, remember that each danish carries the potential to create not only a delightful treat but also a memory that you can share with family and friends. Whether you’re enjoying a quiet morning or impressing guests with your culinary prowess, these blueberry danishes will serve as a delicious reminder of your dedication and love for homemade baking.
Your Next Steps
Now that you’re equipped with all the essential information and insider tips, it’s time to roll up your sleeves and bring your blueberry danishes to life. Take a moment to gather your ingredients, set up your kitchen, and allow yourself to immerse in the joy of baking. Don’t forget to experiment—add your twist with creative toppings or serving ideas that reflect your personal style.
Call-to-Action
If you’ve enjoyed this guide and created your own blueberry danishes, we’d love to hear from you! Share your baking stories, photos, or any tweaks you made to the recipe in the comments below or on social media using the hashtag #BlueberryDanishMagic. Your feedback not only inspires others but also helps create a community where passion for baking flourishes.
Remember, every great pastry begins with a single roll of dough. Now is the perfect time to transform your kitchen into a haven of delightful aromas and flavors. Happy baking!
By following this comprehensive guide, you’ve taken a significant step towards mastering the art of blueberry danish making. With a blend of traditional techniques and modern twists, your pastries will soon become a standout treat on your table. Enjoy the process, experiment with variations, and let every bite remind you of the simple pleasure of creating something delicious with your own hands.